Clients
Iris (Web)
A step-by-step guide to getting started with Nostr with the Iris web client.
Step 1 – Install Alby
Get Alby from the Chrome Webstore or directly from the Alby website.
Once you have the extension installed create a new account. Unless you're a pro already, we recommend just creating an account on Alby and setting up a new Lightning wallet.
Step 2 – Generate a new Private Key with Iris
- Navigate to Iris.to.
- Enter a name and hit "Go"
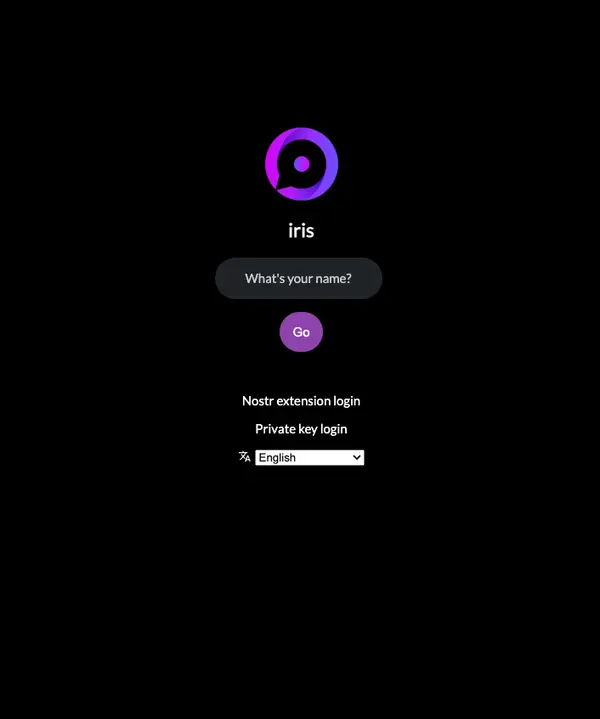
- Iris will generate a new public/private key pair for you and sign you in. You can start following people and posting notes at this point.

- However, we're going to make sure we're using the app in the safest way possible. Head to "Settings" on the left and then click "Nostr" in the secondary menu.
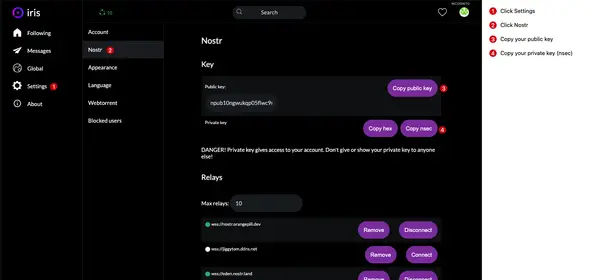
- Copy your public key and your "nsec" private key. These should be stored somewhere VERY safe. Like a password manager (we like 1Password).
- Once you're sure you've saved your private key somewhere safe, click "Account" in the secondary menu and log out of Iris. We'll log back in safely in a second.
Step 3 – Add your new Private Key to Alby
- Once you've created an account and have saved your private key somewhere safe we need to add that key to the Alby extension.
- Open the Alby extension and then navigate to the Alby settings page.
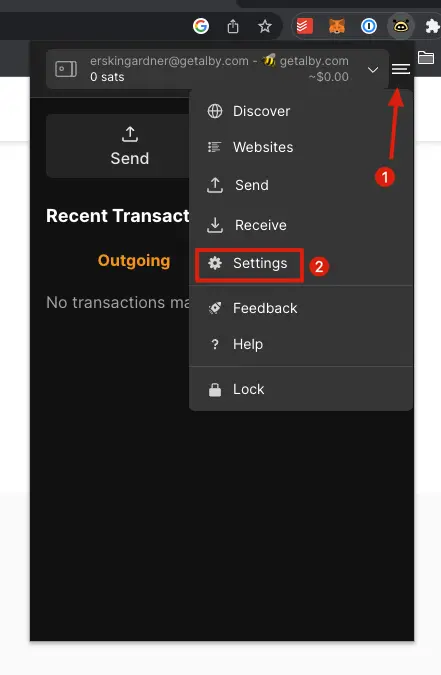
- Scroll to the Nostr section and paste your new private key (this starts with
nsec) in the field. - You're now ready to use Alby to log in and use Nostr through any web client.
Step 4 – Sign back into Iris
- Back on the Iris login page, click "Nostr extension login".
- Authorize key usage in the Alby extension popup that will appear.
- You are logged in! It may take a few moments for content to start loading. 🤙 You'll need to sign using the Alby extension any time you perform an action in Iris. You can check the box to have Alby remember your choice if this bugs you.